Actions
An action in Assets | Lapine Studios is a preconfigured set of changes to perform to an asset. Actions allow administrators to automate highly repeated tasks and to allow users to make controlled actions against assets within Assets.
Access to an action is controlled by groups, but otherwise an action can be used to perform its preconfigured changes against any asset that the user has 'update' over within the organisation, regardless of the operation defined in the action. For this reason administrators should design actions to perform the most minimal of tasks and use them to automate highly repeatable tasks.
Action Guides
How to Create an Action
The following steps walk through creating an Action within Assets:
- Navigate to the 'Actions' page.
- Click on the 'New Action' button.
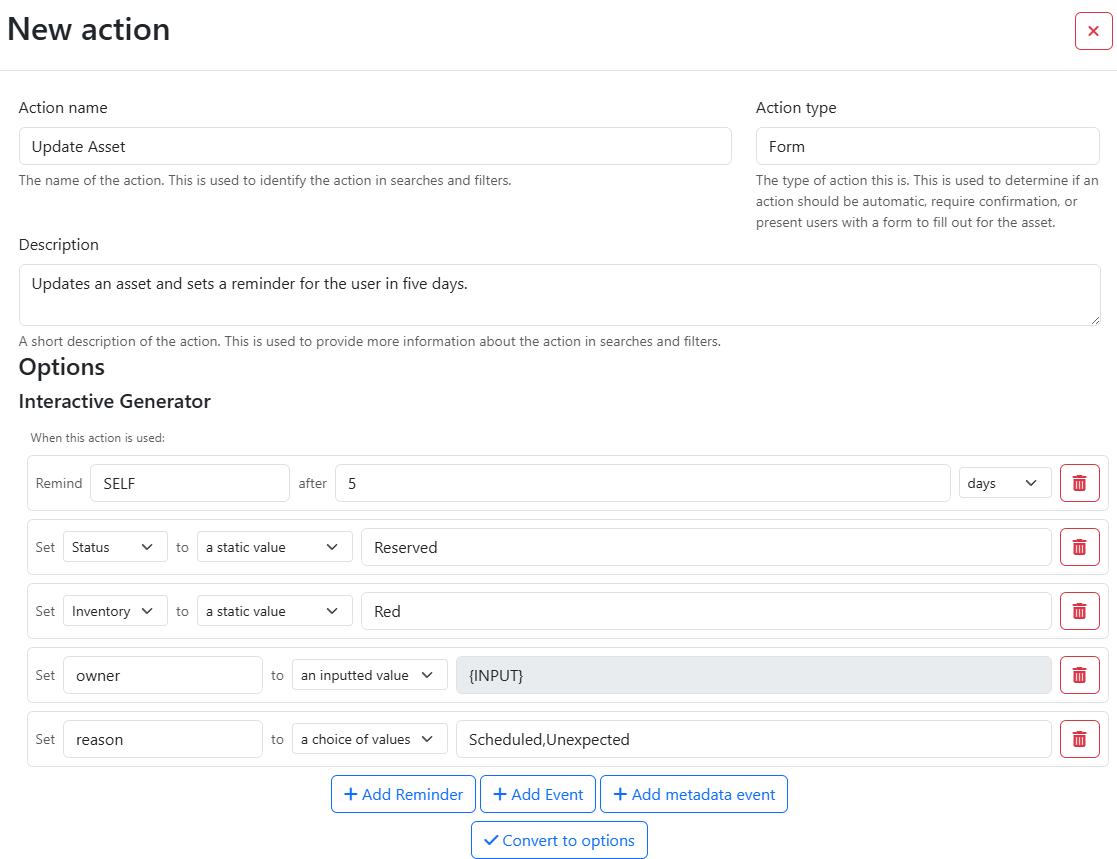
- Enter a name under the Action name and set the Description and Action type fields. An Action type of 'Form' will be required to render user inputs delivered in an action.
- Configure options using the Interactive Generator to add reminders, events, and metadata events. Click the 'Convert to options' button to store the options to the action.
- Click on the 'Create' button.
Action Values
When referring to entities within Assets, you may use either name or their company-unique identifier. For users within the reminder and holder actions, the easiest way to refer to them is by their email address within Assets.
Actions support the following special values:
| Value | Description |
|---|---|
| {INPUT} | Prompts the Action user for input, input is required. |
| {OPTIONAL} | Prompts the Action user for input, input is not required. |
| {DATE} | Automatically fills in the date |
| SELF | Refers to the Action user, valid for reminders and the 'Holder' event. For other reminders, prefer the email address associated with their user for usability. |
When referring to an inventory or asset template use the full name of the template or inventory.
How to Create Assets with an Action
Actions can be configured to 'Create' an asset instead of update an asset. In this case, both an inventory and a template MUST be supplied in the action either as an input, select, or hard-coded value. This also allows organisations to include additional metadata at the time of creation.
How to Allow Access to an Action
The following steps walk through allowing access to an Action within Assets:
- Create an appropriate group and add users to the group.
- Create a group permission with the Action as the target.
How to Use an Action
The following steps walk through using an Action within Assets:
- Navigate to the 'Actions' page.
- Click on the name of an action.
- Fill any of the required fields within the form. If you are expecting a form for user input and one is not available, check that the Action has the 'Form' or 'Form Confirmation' types.
- Enter the company unique asset id for a target asset or the label of an asset and click the 'Submit Action' button.
Alternatively, you can select the 'Scan' button to use an in-built camera to scan barcodes generated within Assets. The scanner will work for a QR code or barcode, provided that it resolves to an asset label within Assets.
How to Edit an Action
The following steps walk through editing an Action within Assets:
- Navigate to the 'Actions' page.
- Click on the 'Edit' button under 'Options'. If you do not see an edit button, you do not have the role required to edit actions.
How to Delete an Action
The following steps walk through deleting an Action within Assets: